[내 웹서버 만들기 (4)] 라즈베리파이에 CMS 구축해 보기
Updated:
라즈베리파이에 CMS를 구축해 보자.
1. CMS는 무엇?
Contents Management System의 약자로, 웹의 콘텐츠들을 관리하는 시스템이다.
하지만 일반적인 CMS는 라즈베리파이에서 돌리기에는 무리가 있으므로, 조금은 가벼운 CMS를 가져왔다.
바로 batflat이다.
2. batflat 블로그 세팅
nginx를 설치하지 않았다면 우선 지난 포스팅으로 가서 설치하고 오자.
2.1. root 계정
root 권한을 얻고 php7.3을 설치해 보자.
apt install software-properties-common
apt update
apt install php7.3-fpm php7.3-common php7.3-mbstring php7.3-xmlrpc php7.3-sqlite3 php7.3-soap php7.3-gd php7.3-xml php7.3-cli php7.3-curl php7.3-zip
myblog.com 서버를 세팅해 보자.
cd /etc/nginx/sites-available
vim myblog.com
cd /etc/nginx/sites-enabled
ln -s /etc/nginx/sites-available/myblog.com myblog.com
nginx -t
service nginx restart
- 도메인: myblog.com
- username: chanhk
- document home: /home/chanhk/html/blog
을 기준으로 myblog.com(또는 다른 도메인 주소) 파일을 세팅해보면
server {
  listen 80;
  listen [::]:80;

  server_name myblog.com;

  root /home/chanhk/html/blog;
  index index.php index.html index.htm;

  client_max_body_size 100M;

  autoindex off;

  location / {
      try_files $uri $uri/ @handler;
  }

  location  /admin {
      try_files $uri $uri/ /admin/index.php?$args;
  }

  location @handler {
      if (!-e $request_filename) { rewrite / /index.php last; }
      rewrite ^(.*.php)/ $1 last;
  }

  location ~ \.php$ {
      include snippets/fastcgi-php.conf;
      fastcgi_pass unix:/var/run/php/php7.3-fpm.sock;
      fastcgi_param SCRIPT_FILENAME $document_root$fastcgi_script_name;
      include fastcgi_params;
  }
}
2.2. user 계정(여기서는 chanhk)
user 계정에서는 batflat를 받고 블로그를 세팅한다.
그리고 local 컴퓨터에서 hosts파일에 해당 도메인 주소를 추가한 다음(방법은 지난 포스트에 있음) 해당 도메인 주소로 접속해 보면 성공…!
cd ~/html
wget https://github.com/sruupl/batflat/archive/master.zip
unzip master.zip
mv batflat-master blog
cd blog
mkdir ./tmp
mkdir ./admin/tmp
chmod -R 777 ./uploads ./inc/data ./admin/tmp ./tmp
3. 웹페이지 설정
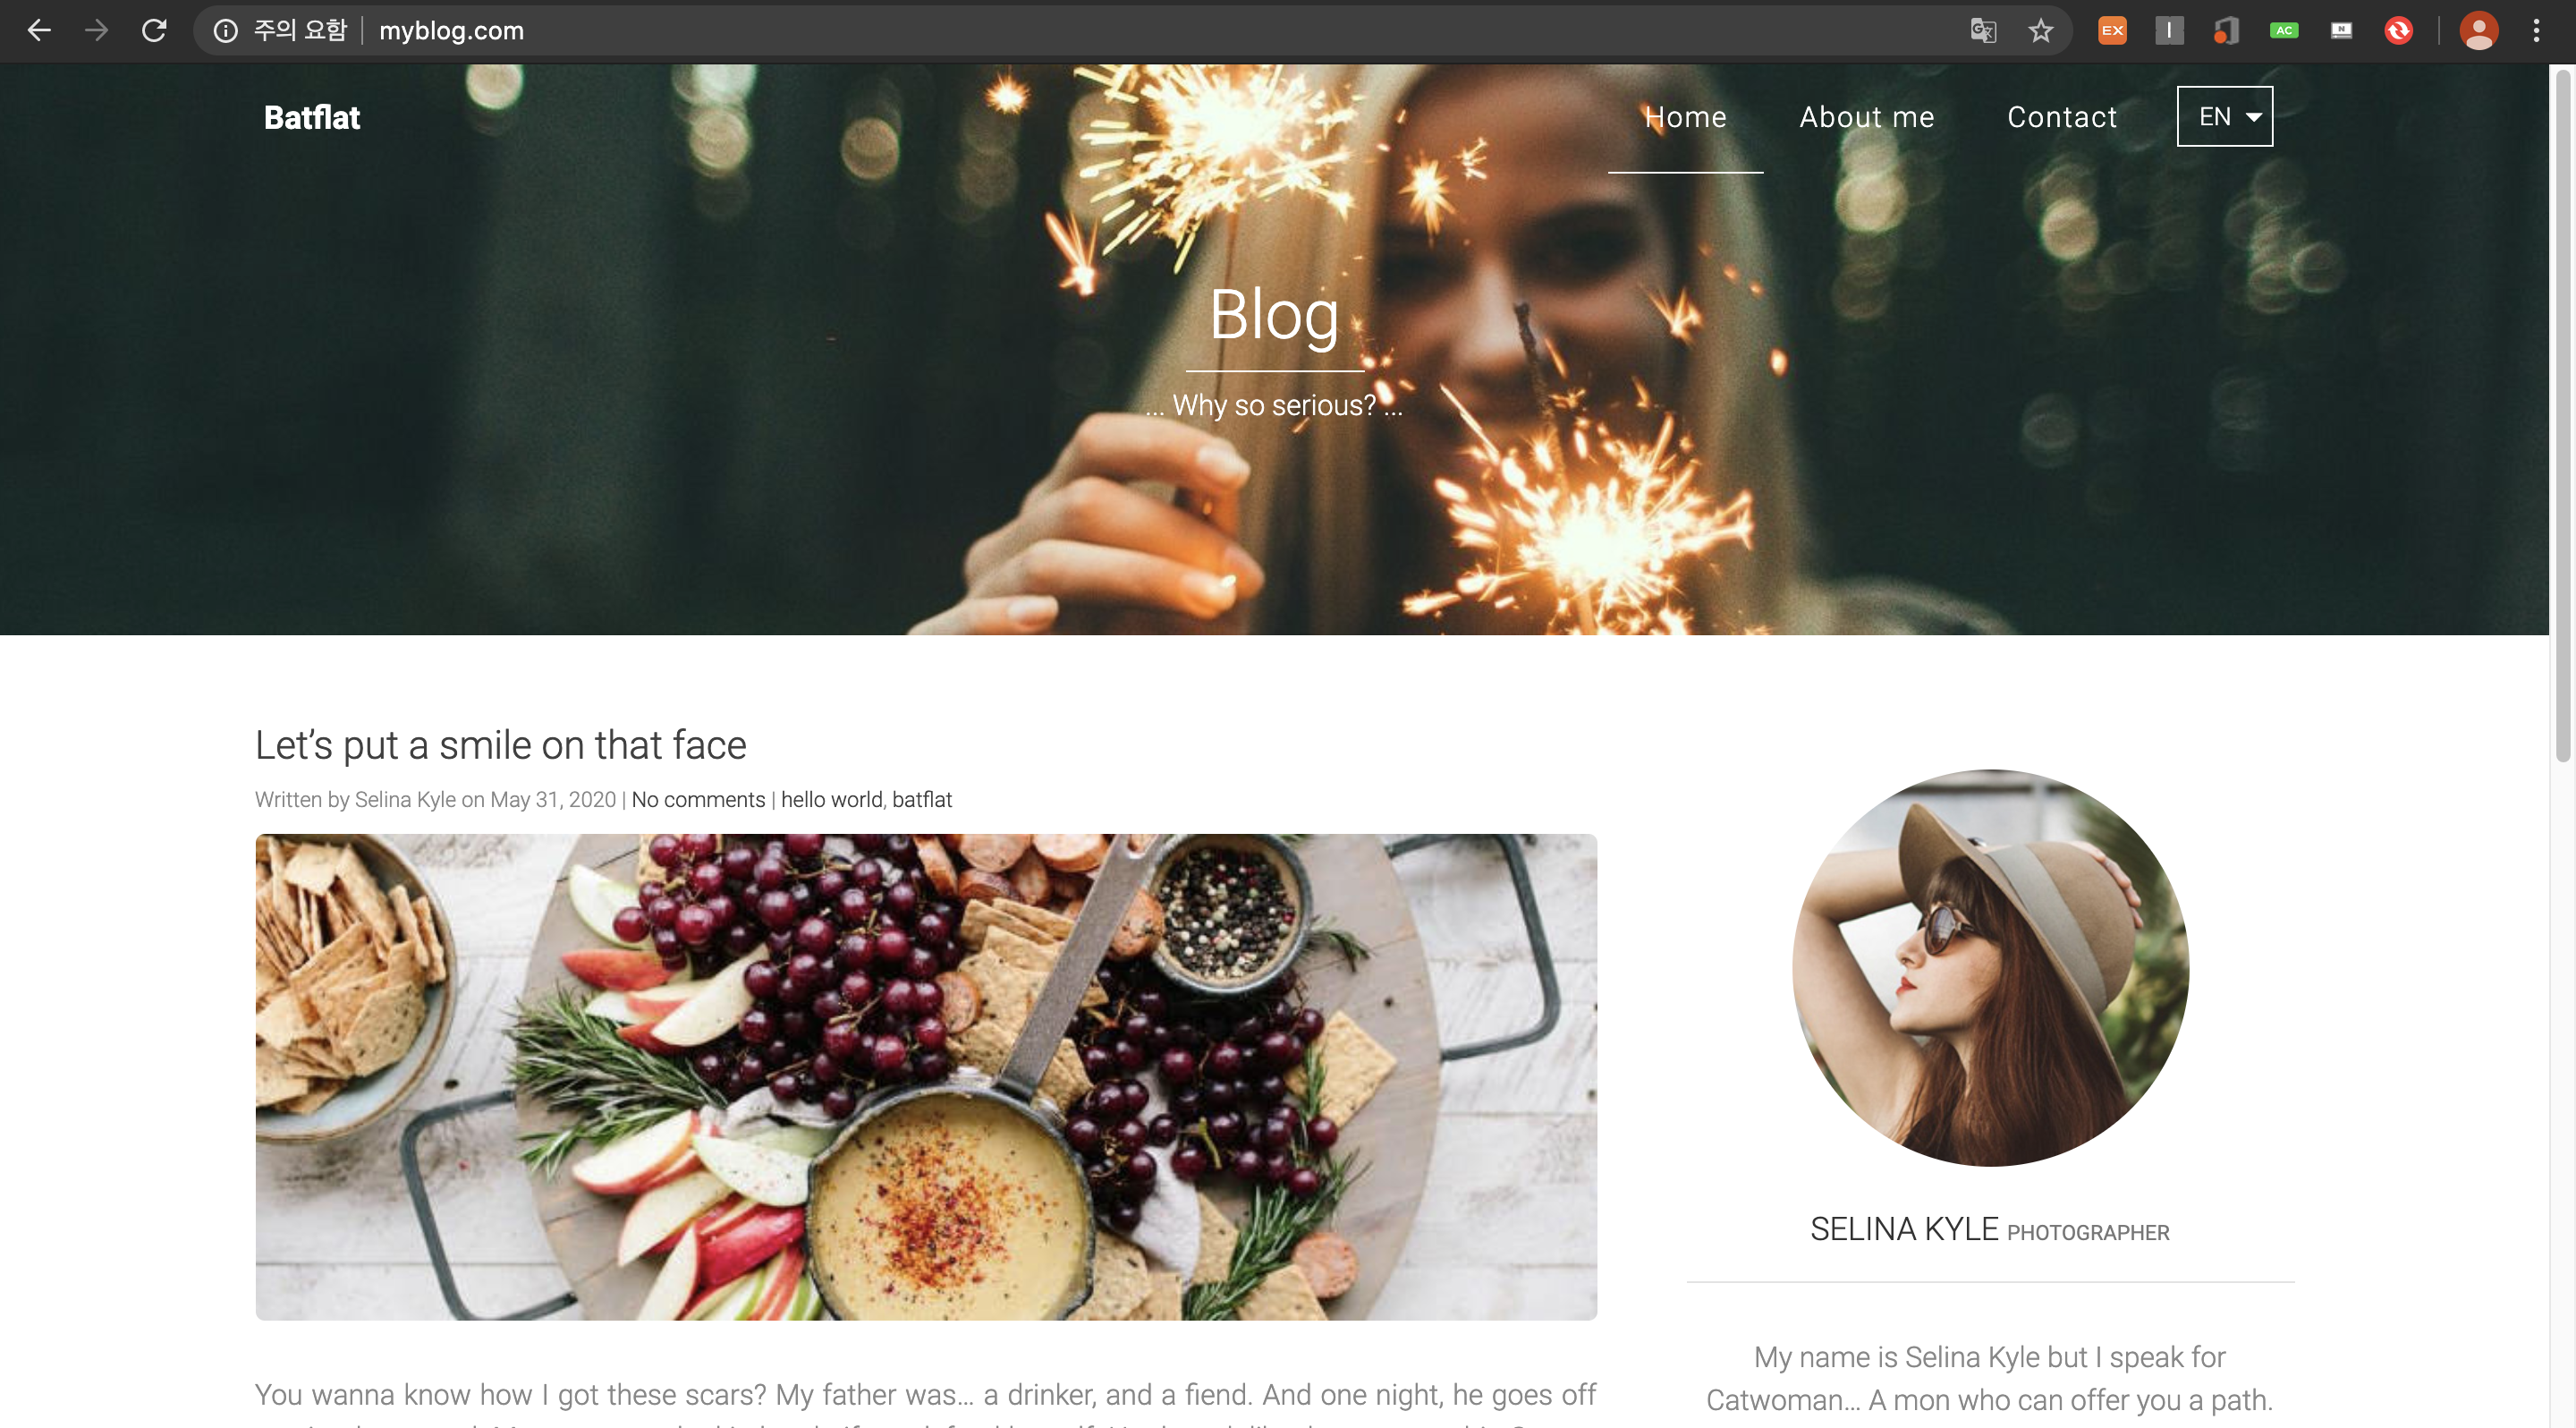
방금 접속한 도메인 주소에 /admin을 추가해서 접속해 보자.
그러면 로그인 창이 하나 나올건데, id: admin / pw: admin으로 설정되어 있으므로 로그인해 보자.
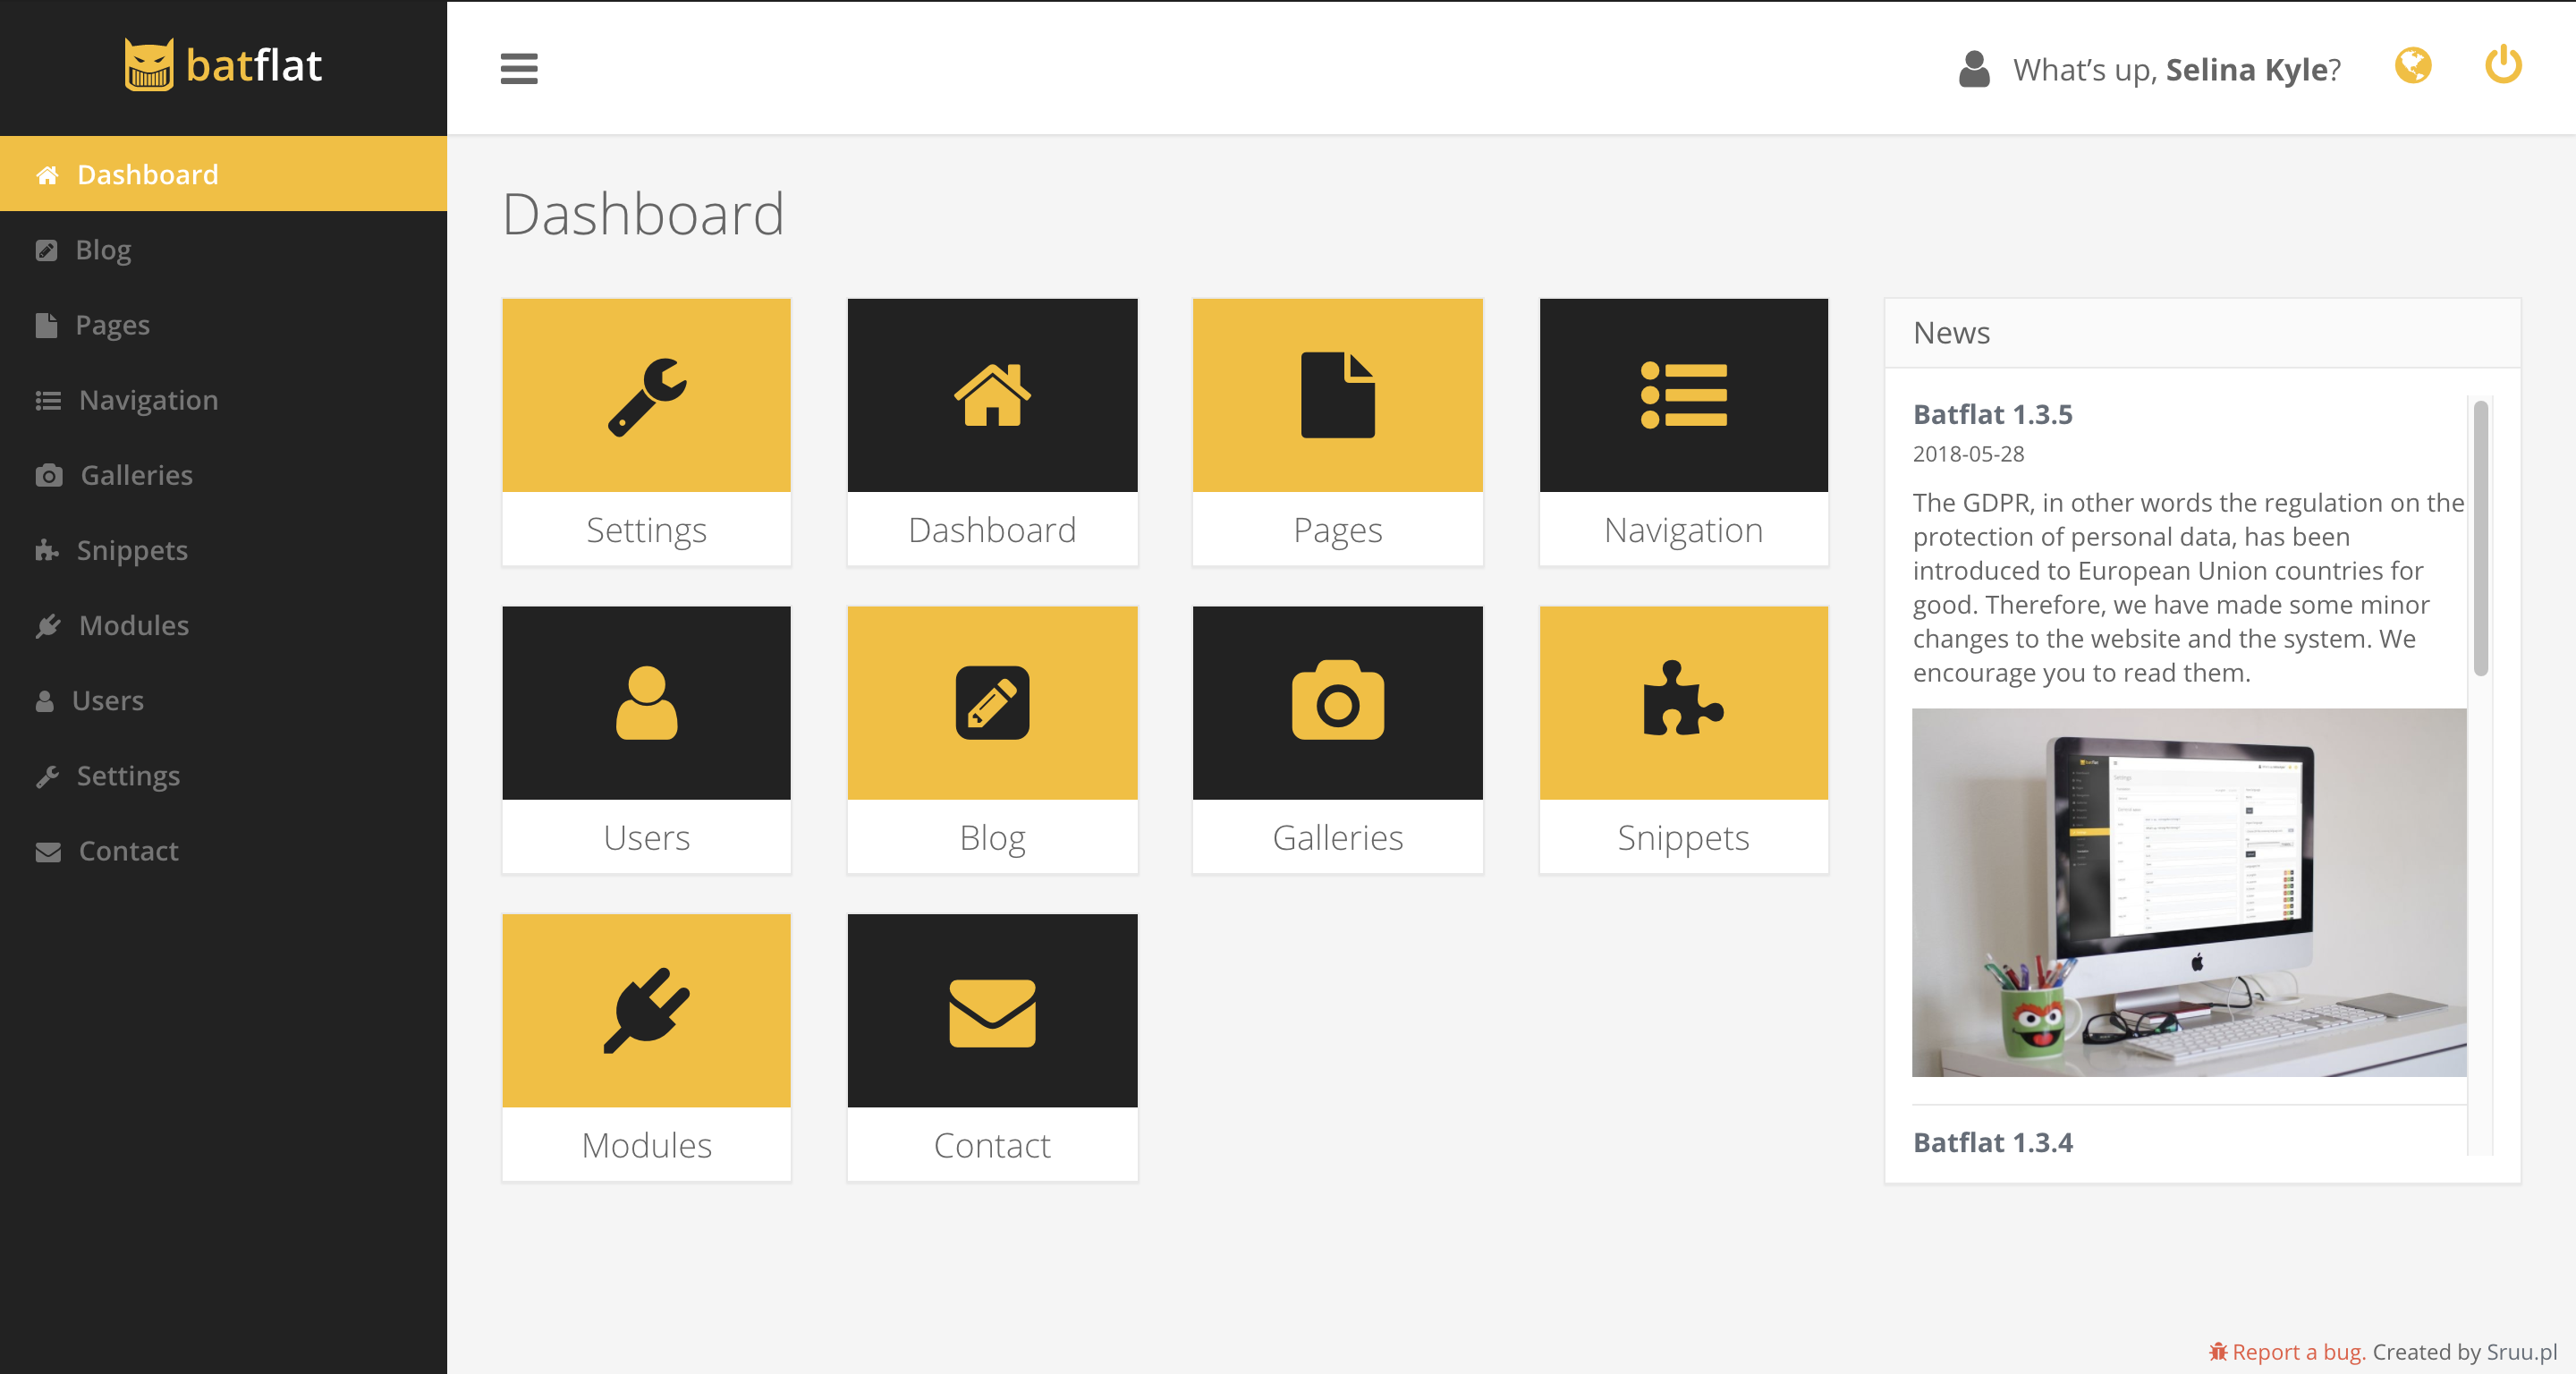 로그인 성공 시 이런 창이 뜬다.
여기서 항목들을 하나하나 둘러보며 여러 설정을 하면 된다. 그리고 글도 여기서 올릴 수 있다.
블로그의 글을 퍼나르려 하니, 이미지 크기가 제대로 조절이 안되고, 코드블럭도 적용이 잘 안됨을 알 수 있다. 이를 해결하려면 md 형식의 글들을 다른 형식으로 고쳐야 할 것 같다.
하지만 현재는 포스팅 테스트를 하는 것에 의의를 두기로 해서, 수정은 하지 않을 것이다. 언젠간 할듯…?
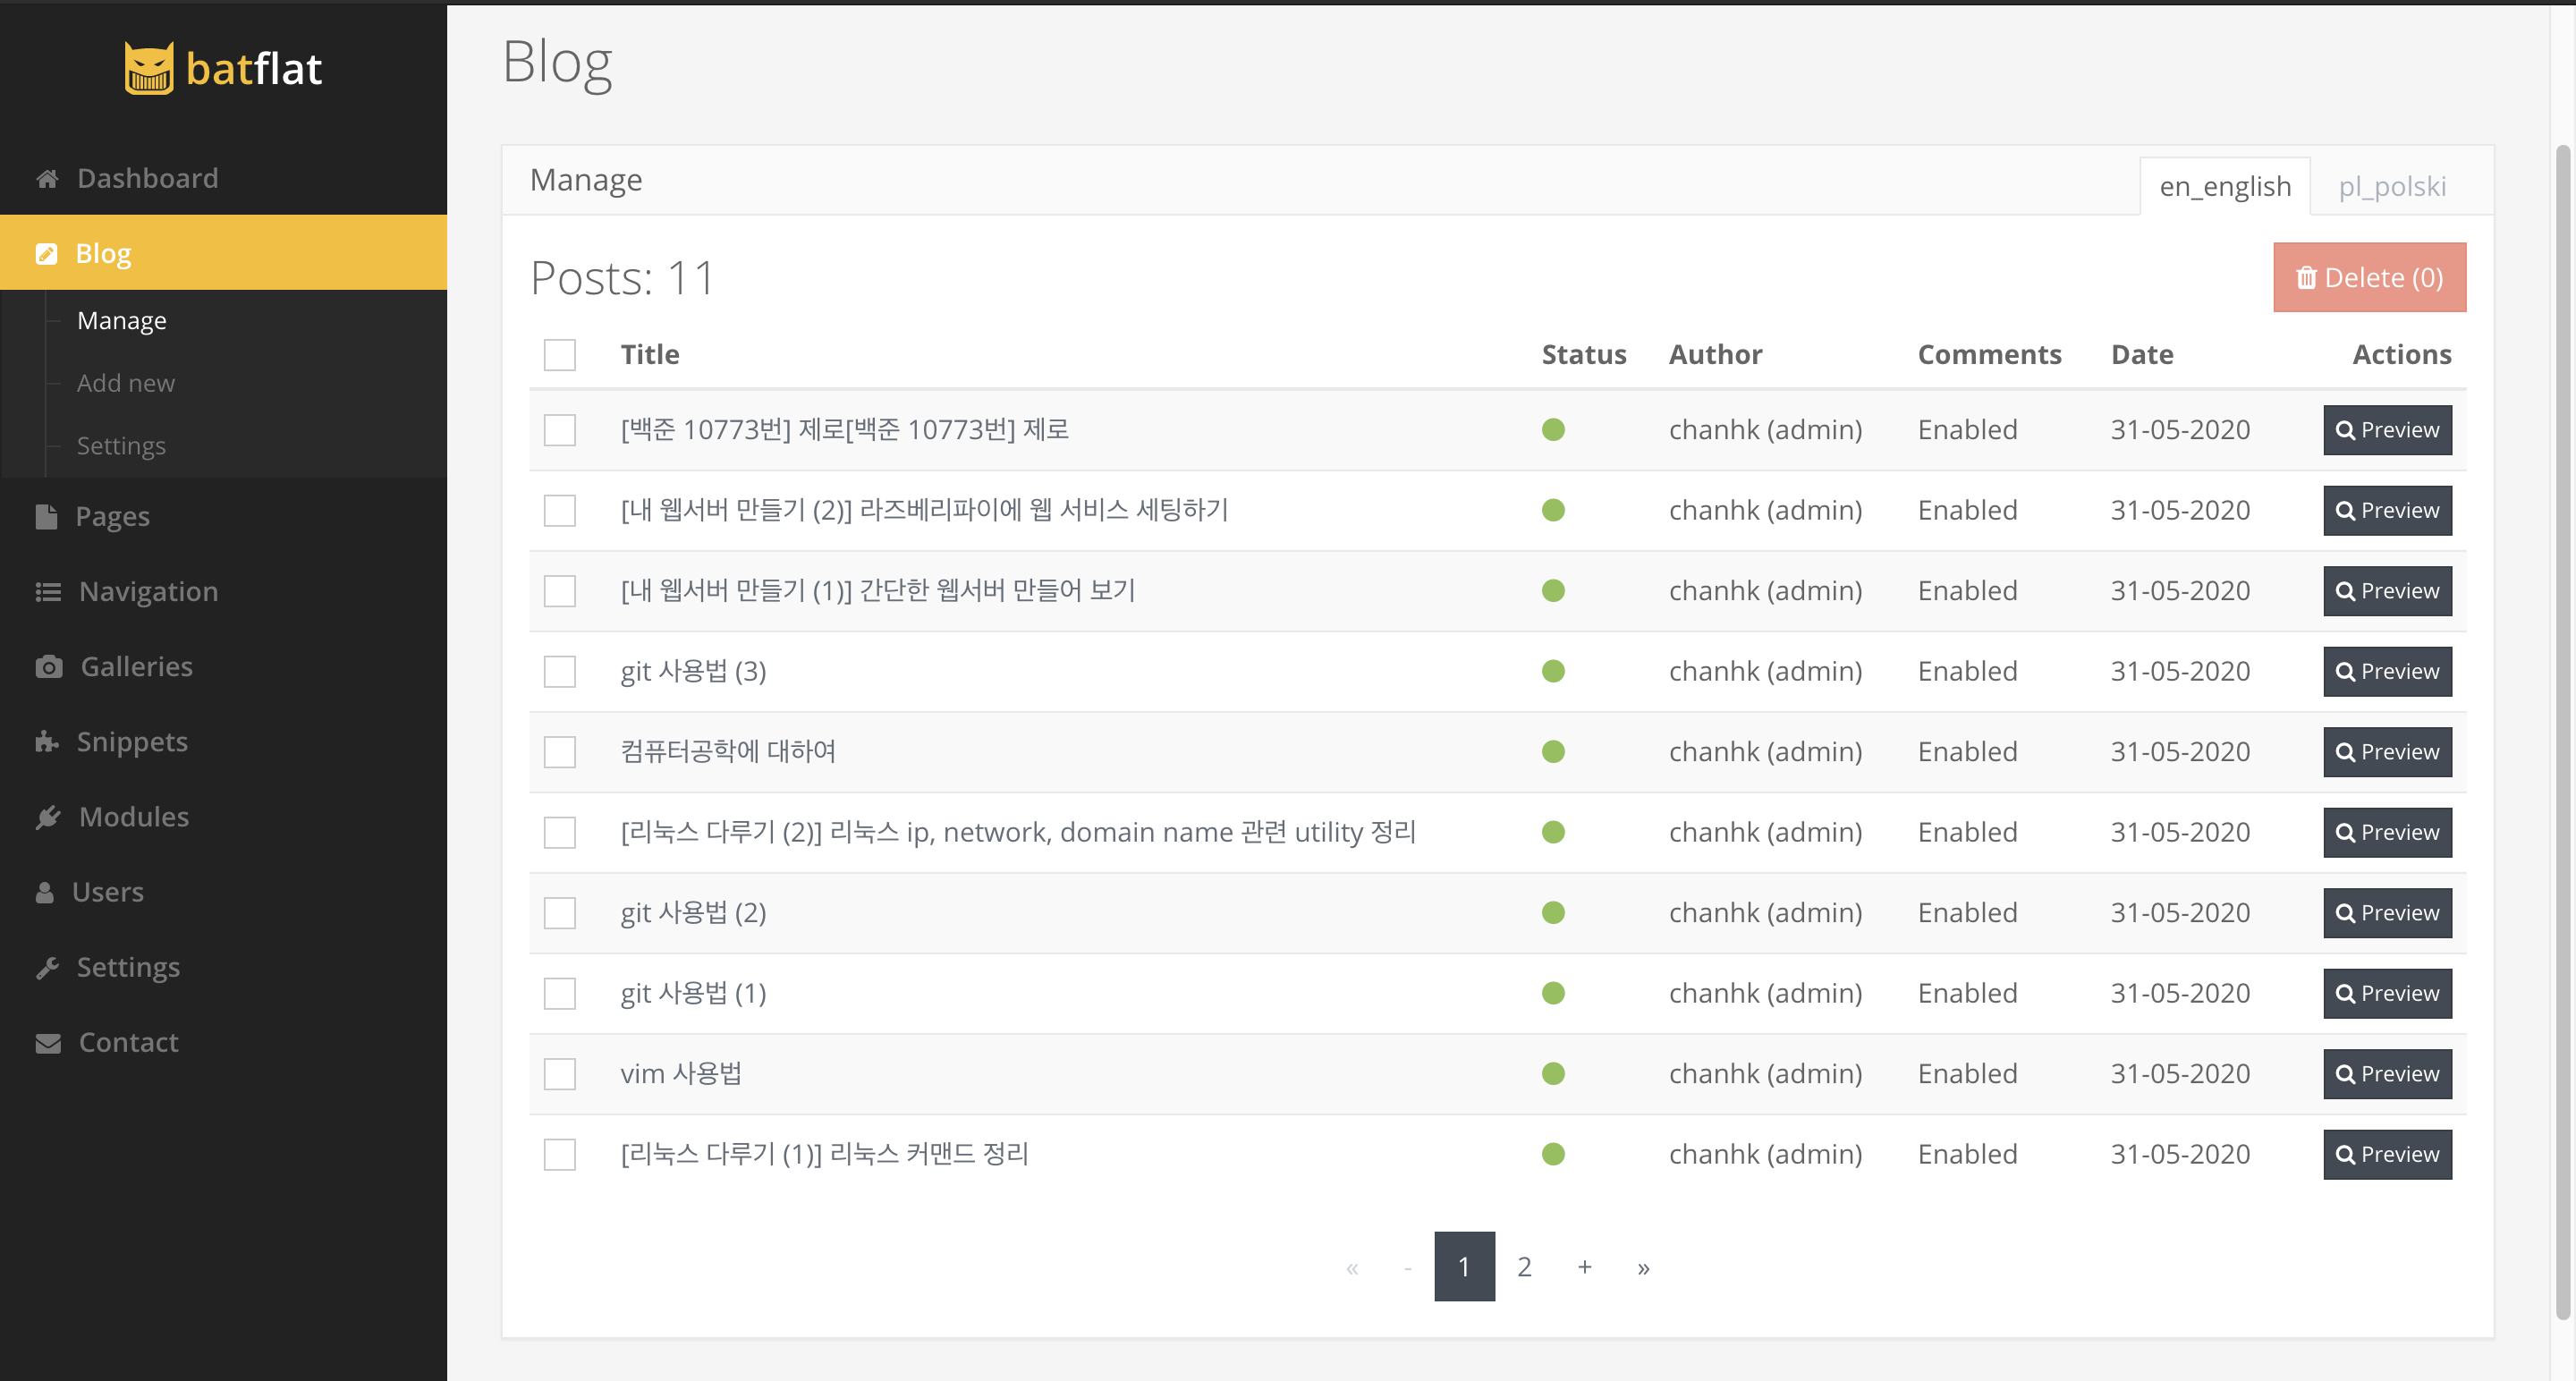
참고로 포스팅 작업은 admin 페이지의 blog 항목에서 할 수 있다.
4. 마무리
이상으로 라즈베리파이에 블로그를 세팅해 보았다. 간단한 작업이었지만 내가 내 블로그 서버를 운영해보는 것도 좋은 경험이었던 것 같다…
Leave a comment